


Photo by Mohamed Kerroudj on Unsplash
How to setup a beautiful macOS terminal from scratch
Just got a new MacBook or iMac? Learn how to setup a beautiful and functional macOS terminal from scratch, with iTerm2 + zsh + powerlevel10k/starship


Setting up macOS terminal from scratch
Just got a new MacBook or iMac? Learn how to setup a beautiful and functional macOS terminal from scratch
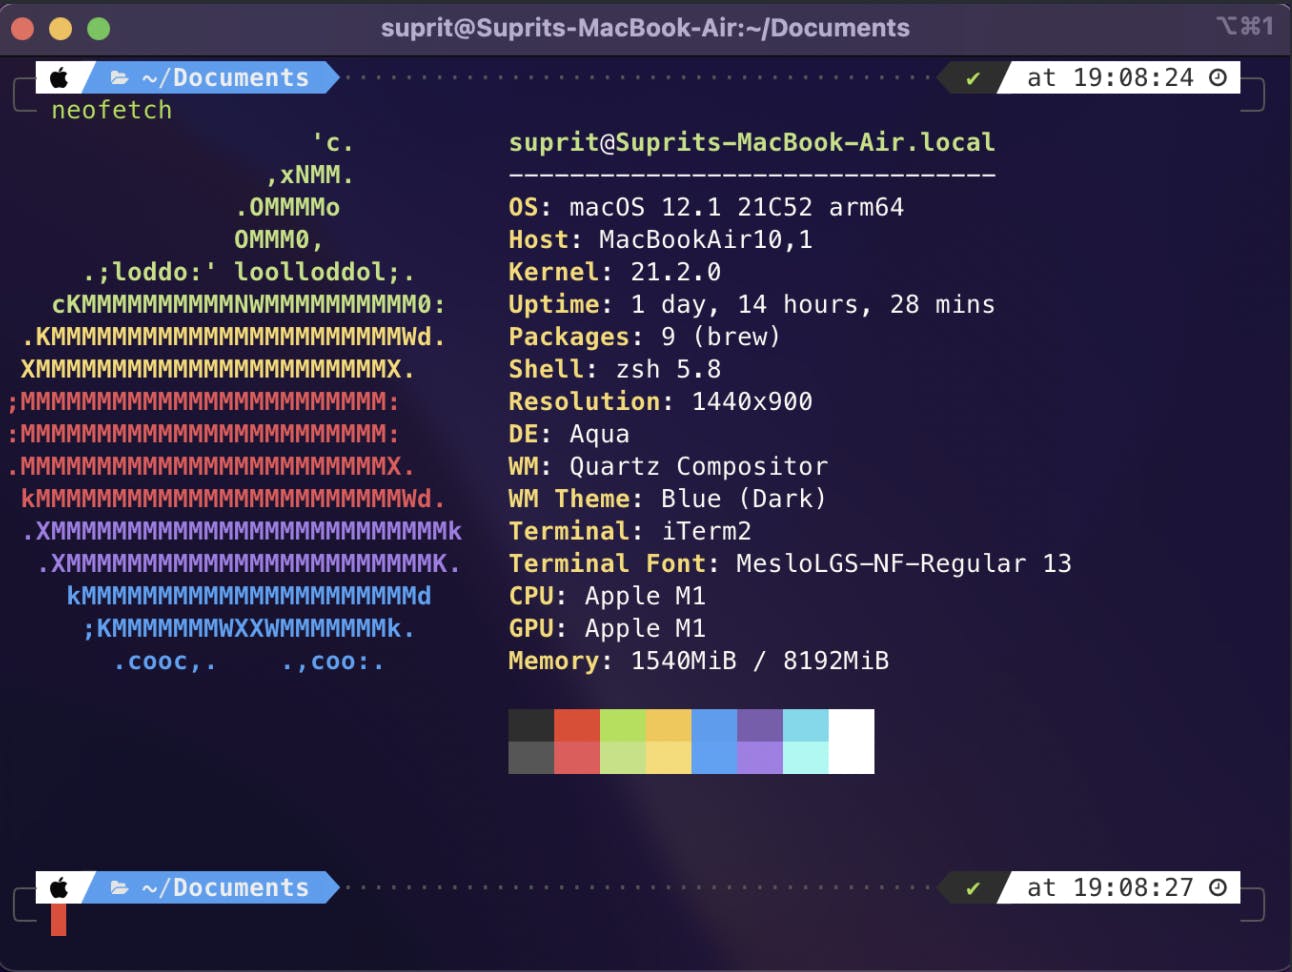
Overview of final config : iTerm2 + zsh + oh-my-zsh + powerlevel10k/starship
This tutorial was written for the newer Apple silicon chips (M1/M1 Pro/M2 and so on) and macOS Monterley 12.1
As a preview, this is the terminal we'll end up setting up
For context, this is the default macOS terminal we'll be starting with!
Homebrew
Homebrew is a package manager for macOS (as well as GNU/Linux), that makes it extremely convenient to download, install, upgrade and maintain packages (think applications, or software libraries, or command line tools). Lets say you want to install the Firefox, all you have to to is type in brew install firefox on the terminal, rather than searching for the Firefox website, going to its website, finding the download link, open the installer and follow through all the steps. Its equally easy to remove packages, and upgrade them with simple terminal commands. Some package managers popular in the GNU/Linux world are apt (for Debian based distributions), pacman (found in Arch based distributions) and dnf (Fedora). The most widely used package manager for macOS is homebrew
Installing Homebrew
First off, we need certain command line tools available through XCode. We do that using :
$ xcode-select --install
Follow through the prompts to start the installation and accept the software license.
We then install the homebrew installation script using curl. Do verify this exact installation script link from the homebrew website.
$ curl -fsSL https://raw.githubusercontent.com/Homebrew/install/HEAD/install.sh
It is a good idea to verify the contents of a script you run from the internet, and you can do this using less, vim or any other editor or text viewer of your choice
We then execute this script through bash :
$ bin/bash install.sh
Now, we add the homebrew executable to our PATH such that we can directly use the brew command on our terminal without having to specify its executable's location everytime. The shell looks through all the directories specificed in the PATH to find the executable for any command you enter into your shell.
Note that the location of the homebrew installer differs for Intel chips and for the ARM based M1 Silicon chips. For the latter, the location is /opt/homebrew/bin. You can check the exact path location conveniently while running install.sh for the first time
Warning: /opt/homebrew/bin is not in your PATH.
The path you see in this warning is the path you need to add on to the PATH of your shell.
The newer macOS versions come with zsh shell by default, so we now modify the zshrc (or the config file for whichever shell you are using) and add on the homebrew executable path to PATH using the text editor of your choice. I'll be using vim here :
vim ~/.zshrc
We need to add to the end of zshrc :
()Note that if you have not configured your system at all, there's good chances the ~/.zshrc file does not exist. In that case just create the file and add the below command to the newly created file)
# Add homebrew executable location to PATH
export PATH=/opt/homebrew/bin:$PATH
Now, we use source to get our changes to zshrc to effect
$ source ~/.zshrc
To see if everything was installed properly, try running :
$ brew help
To install something using brew :
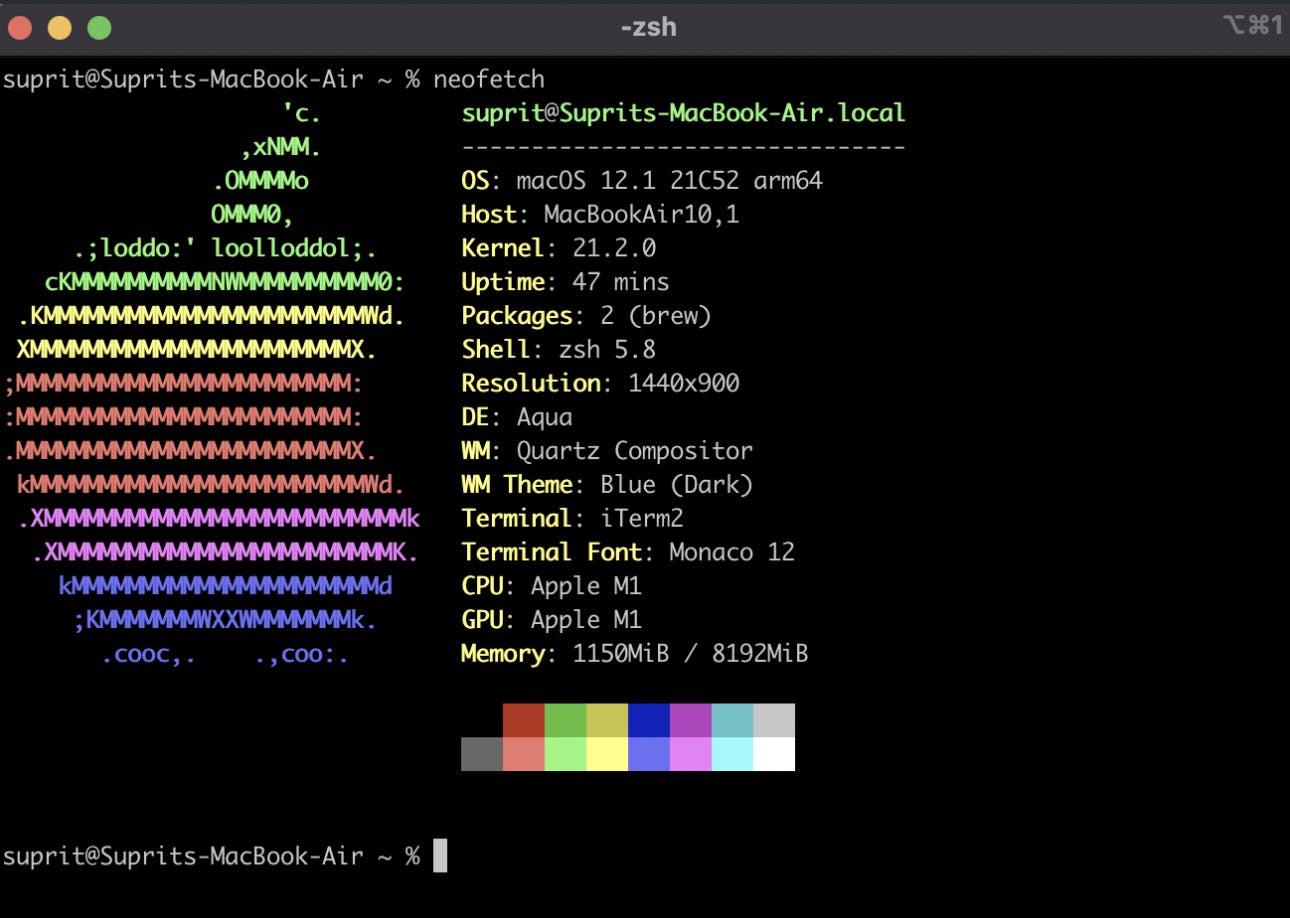
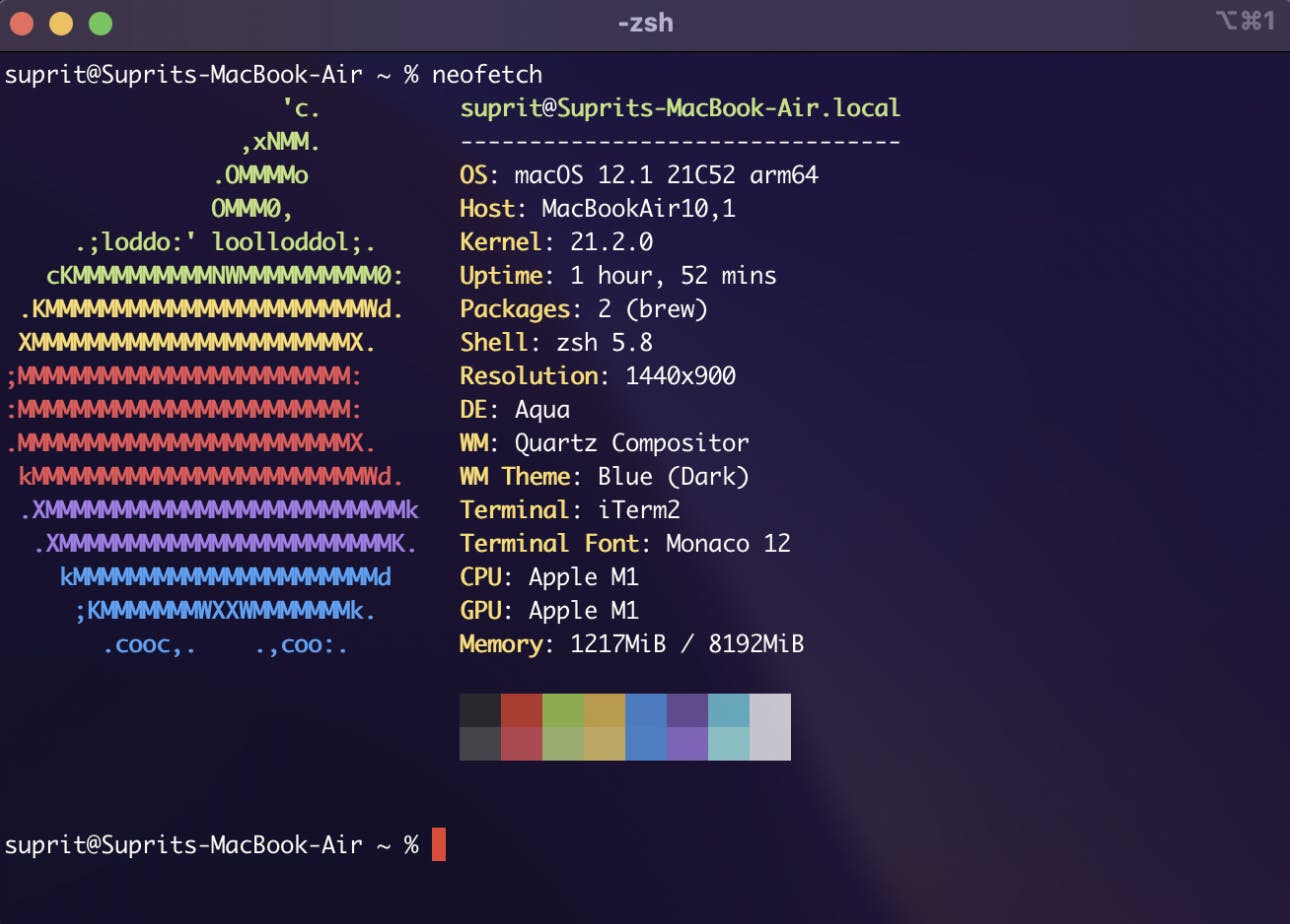
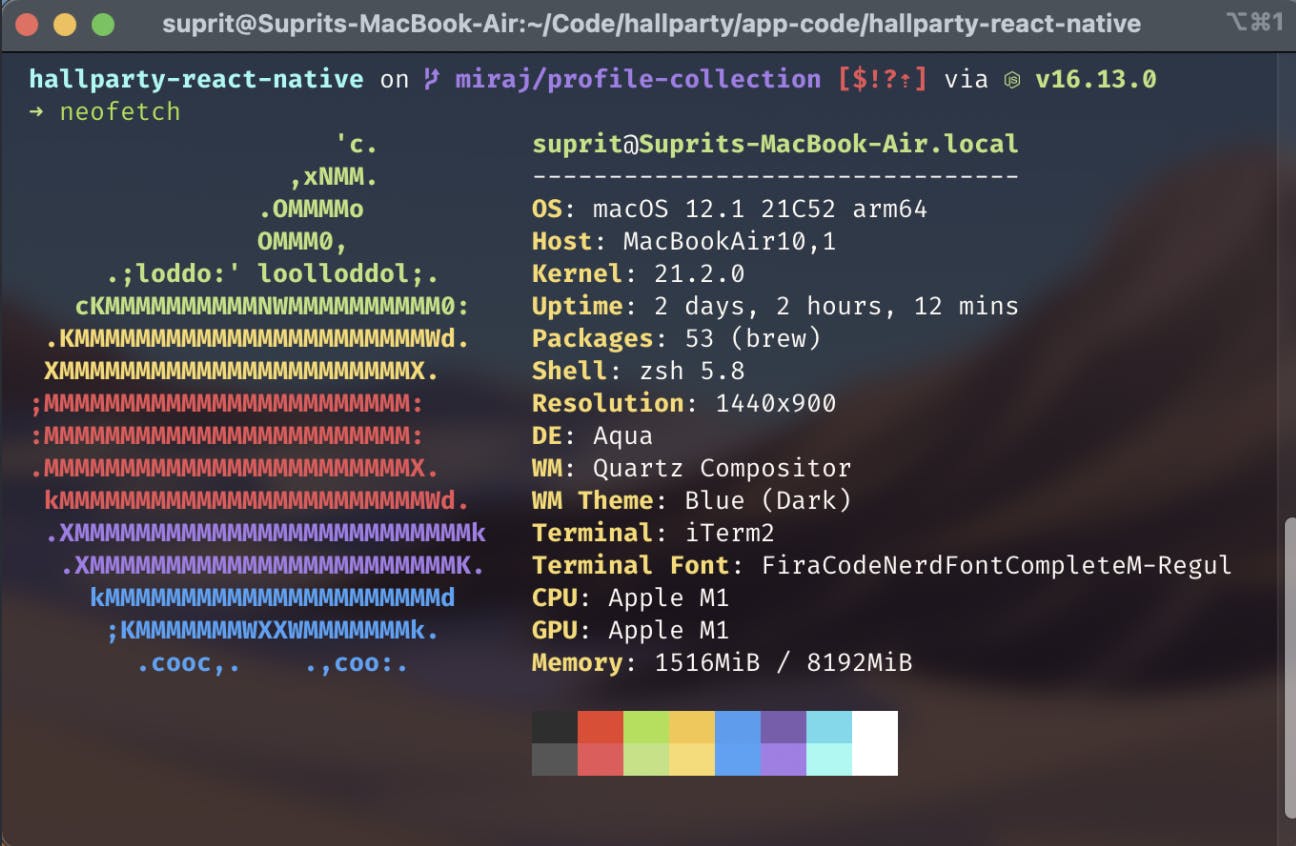
$ brew install neofetch
You should get something like this on your terminal on running neofetch:
Terminal Emulator
A terminal emulator is the program through which you interact with your shell and enter commands into it. While the default terminal is just alright for the occasional terminal use, if you're someone who's heavily interacting with terminals on a daily basis you want to have a powerful, feature-rich and heavily customisable terminal emulator that is made for the power user.
There are a lot of choices for choosing a terminal emulator around, each with their own feature sets, advantages and compromises. Some terminal emulators aim to be extremely minimal, lightweight and fast at the cost of fancy features (such as alacrity), while some terminal emulators are full blown Electron apps built with JavaScript (such as hyper.js) and web technologies which offer a beautiful and customisable terminal out of the box at the cost of speed.
A lot of factors go into choosing the right terminal emulator, and its entirely a personal choice depending on your needs and the specific tradeoffs you are willing to make., there's no one objective "best" terminal out there.
My personal tool of choice on GNU/Linux is this extremely feature rich , fast (its GPU accelerated!) and fairly easily customisable terminal emulator called Kitty. Although this time around, in the spirit of trying out something new, I'll be going with the extremely popular and feature rich terminal emulator aimed towards power users for macOS called iTerm2. A major caveat to keep in mind with iTerm2 is that it is not cross platform. But it is a great choice if you need something powerful built and optimised just for macOS.
Installing and setting up iTerm2
Now that we can use the wonders of a package manager, installing iTerm2 is as simple as:
$ brew install iterm2
This is how iTerm2 looks out of the box. A bit too dull and bland, eh? Lets go about customising this. While you can directly edit the config file for iTerm2, it also provides a pretty neat GUI tool to change its configuration and settings.
To beautify iTerm2, you can check out some of the pre-installed themes in Preferences -> Profiles -> Colors -> Color Presents. If you don't find any of the themes satisfying, there are a bunch of themes available online. You just need to download the theme file and import it into iTerm2 to use them. iTerm2colorschemes is an amazing website to find a whole lot of universal terminal color schemes. I personally picked up the Ayu Mirage color scheme from here. To quickly download it, just do:
$ cd Downloads # or wherever you'd like to download the color scheme
$ curl -O "https://raw.githubusercontent.com/mbadolato/iTerm2-Color-Schemes/master/schemes/Ayu%20Mirage.itermcolors"
Then go to Preferences -> Profiles -> Colors -> Color Presents and just import all the downloaded themes you want to try out.
You can also get a frosted glass-esque blur right out of the box by tweaking the transparency and blur radius in Preferences -> Profiles -> Window. Do keep in mind that a large blur radius affects performance, so if you want to not compromise on performance it is best to disable blur radius. I'll personally be using a transparency value as well as blur radius value of 25
Ultimately, you get a terminal looking like this:
Shell
Another choice that you need to make in the process of setting up your terminal environment is that of the shell. The shell is the actual program running in a REPL loop that you input your terminal commands into. There are various kinds of shells available, the three most major ones being bash, zsh and fish.
bash is hands down the most widely used shell, being the default shell in most GNU/Linux distributions, and its extremely stable, well maintained. With its first release in 1989, it was developed by GNU as a free replacement of the Bourne shell. While it doesn't offer fancy features like many of the newer shells, it offers a tried and tested, fairly minimal and bloat free experience, and consistency in the sense that more likely than not you'd find a bash shell in most machines you say ssh into.
zsh is essentially bash but modernised with a bunch of features and quality of life improvements added. It is also much more customisable than bash, with a lot of plugins and themes and a thriving community.
fish is another modern shell that offers an opinionated minimal but very functional shell. It brings in some great features out of the box like intelligent auto-completion. Its the best shell if you want something modern and functional without tinkering around a lot. It is not as configurable as zsh, but its default out of the box experience is significantly better. The major caveat with the fish shell is that it is not POSIX compliant, which means that there's no guarentee that bash scripts would work well with fish, and things might be different from what you'd expect in a POSIX compliant shell. (POSIX is a standard released by IEEE around how Unix programs and operating systems should operate and interact, you'll come across this term a lot in the Unix world. You can expect all behavior specified in the standard from a POSIX compliant operating system or application)
macOS used to ship with bash by default until very recently, with zsh being the default shell from macOS Catalina and onwards. This shift primarily was due to licensing, Apple was stuck with a horribly outdated version of bash since the extremely free and libre and open GPLv3 license (compared to the earlier GPLv2 which bash shipped with till around 2008) probably offered a lot of hurdles to the almost entirely proprietary and closed source Apple ecosystem ([This article is a good explainer](Why does macOS Catalina use Zsh instead of Bash? Licensing))
I personally use zsh as it is extremely powerful, customisable and the plugin ecosystem is amazing. If you want to go ahead with zsh, you don't have to change up anything, since its already the default shell!
Configuring zsh
To manage plugins and themes related to zsh, its a good idea to get a framework for managing these (sort of similar to how brew makes it easy to install , manage and update applications). I is absolutely not essential to use an entire framework to add in plugins (which are at the end of the day zsh scripts). In fact, a lot of people consider oh-my-zsh fairly bloated for just managing plugins and themes, with some suggesting lightweight alternatives such as pretzo while other just manually adding in plugins and configuring them, not liking the fact that a framework complicates and abstracts away this process.
That said, the main rationale for going with oh-my-zsh is that it is extremely simple in the sense that adding plugins becomes as simple as adding their name to zshrc, and that it is simply the most popular option with a lot of community support, resources and documentation. It also stays out your way. If you're someone who likes to deeply understand how their shellrc works, add in only the things they want and be in control, its probably a bad idea ot go with something like oh-my-zsh. On the flip side, if you want to quickly and easily just plop in functionality through plugins and change themes , a plugin manager like oh-my-zsh is the way to go. While currently I'll be setting up oh-my-zsh, I do plan to experiment with a more lightweight plugin manager like pretzo.
oh-my-zsh
To install oh-my-zsh, run:
$ sh -c "$(curl -fsSL https://raw.githubusercontent.com/ohmyzsh/ohmyzsh/master/tools/install.sh)"
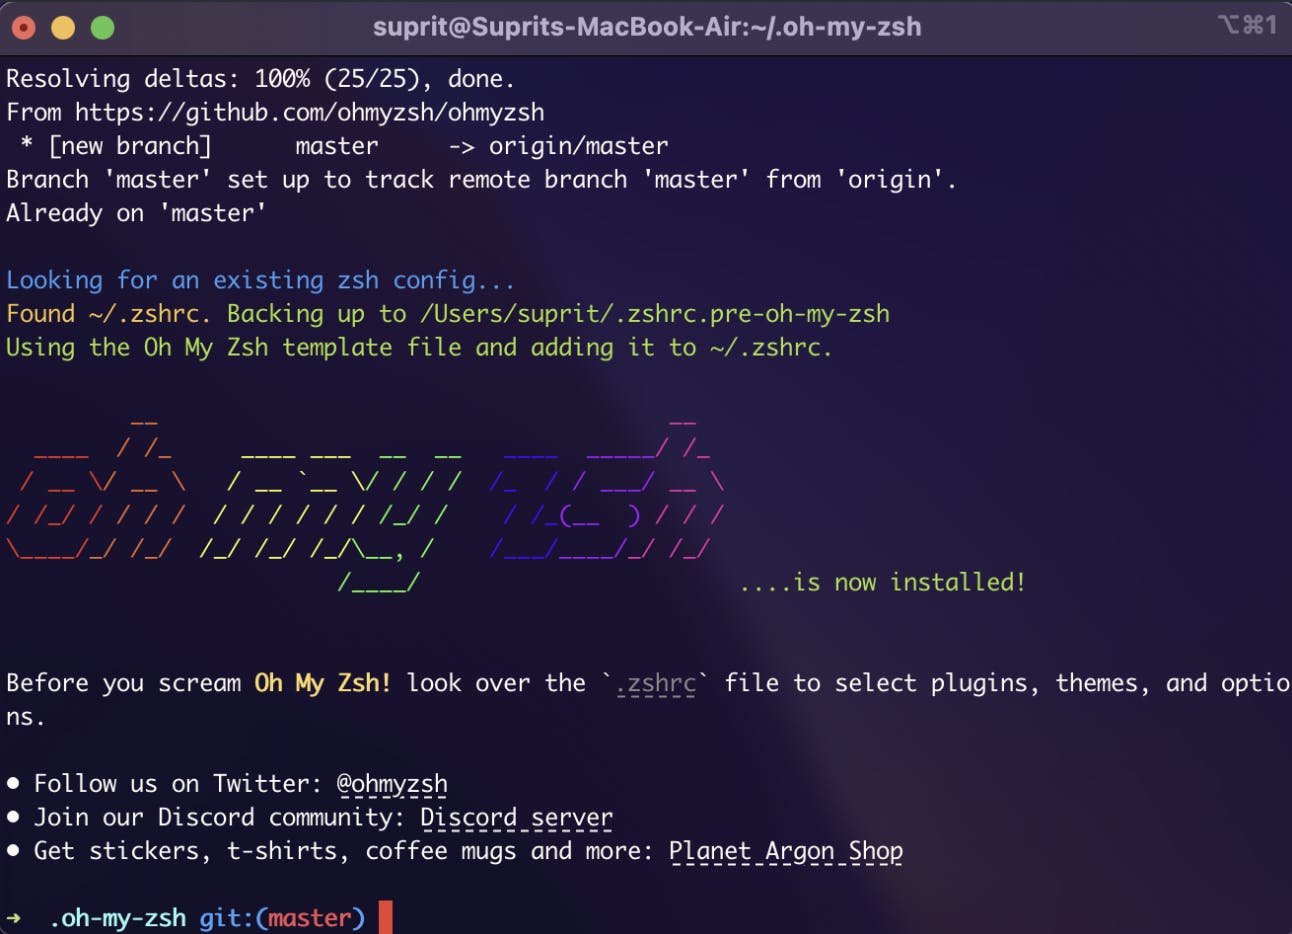
oh-my-zsh sorta takes over your zshrc (the config file for zsh) and slaps in its own defaults. One of the most visible changes right after installing oh-my-zsh is that it changes the zsh theme to its default (Robby's theme, the theme created and used by the maker of oh-my-zsh). You can notice that the prompt has significantly changed.
The prompt is one of the most integral visual aspects of the shell. Prompt is the part which earlier was in the format username@device-name ~% and now in Robby theme is an arrow followed by the current directory and information about the git repository.You can customise the prompt to give you a lot of information - such as the current time, how long it took a process to run, battery percentage, version numbers of some programming environments you are in, and so on. As a programmer though, perhaps the single most useful thing you can customise the prompt to tell you is git information in case you're currently in a directory which is a git repository. It can tell you things like the current git branch you are in, whether there are unstaged changes, and so on.
I personally alternate between starship and powerlevel10k for my zsh theme (and terminal prompt in general). They are very elegant, customisable and quite functional. This time around, I'll be going with powerlevel10k
Powerful oh-my-zsh plugins
With plugins you can truly harness the power of the community on making the terminal more useful. Even if you want to avoid the fancy stuff, there are some absolute must have plugins, such as zsh-syntax-highlightingandzsh-autocomplete, two plugins I cannot live without at this point. Both of them give non autocomplete along with syntax highlighting, with the former giving fish shell esque non intrusive autocomplete suggestions based on your terminal usage history, and the latter giving syntax highlighting similar to those in a modern code editor, with wrongly typed/incorrect commands in a different color making them really easy to spot, strings being a different color, and so on.
To install zsh-autocomplete, clone this repository:
git clone https://github.com/zsh-users/zsh-autosuggestions ${ZSH_CUSTOM:-~/.oh-my-zsh/custom}/plugins/zsh-autosuggestions
To install zsh-syntax-highlighting, clone this repository:
git clone https://github.com/zsh-users/zsh-syntax-highlighting.git ${ZSH_CUSTOM:-~/.oh-my-zsh/custom}/plugins/zsh-syntax-highlighting
Now we need to head over to our zshrc and source these plugins in there:
plugins=(
    # other plugins...
    zsh-autosuggestions
    # other plugins...
    # zsh-syntax-highlighting must be the last plugin sources
    zsh-syntax-highlighting
)
There are many other plugins out there, its always nice to be on the lookout for useful ones to better your terminal experience. Do note that having a lot of plugins enabled might slow down your terminal.
Brief Aside on Fonts
But before we go ahead to that, its a good idea to install some terminal friendly fonts. The primary advantage such fonts offer is the support for ligatures, wherein two or more characters combine to make a glypyh. For instance, a <= sign turns into something more akin to how you would write a less than or equals to sign on paper. We want to have a ligature friendly font so that your prompt can display these fancy ligatures which look quite nice on the terminal
On iTerm2 or or Termux, powerlevel10k can automatically install a font that works great with it, but there's a whole host of fonts you can check out with great ligature and glyph support for your terminal. JetBrains Mono is one font that I've been using as my primary font on all my IDEs and programming enviornments, and it works quite well on the terminal as well.
Powerlevel10k
powerlevel10k is the zsh-theme we'll be using in this guide. For installing it, run:
git clone --depth=1 https://github.com/romkatv/powerlevel10k.git ${ZSH_CUSTOM:-$HOME/.oh-my-zsh/custom}/themes/powerlevel10k
We then need to change the zsh theme by setting: ZSH_THEME="powerlevel10k/powerlevel10k" in ~/.zshrc
Aftering sourcing zshrc or restarting the terminal, you should see this config screen:
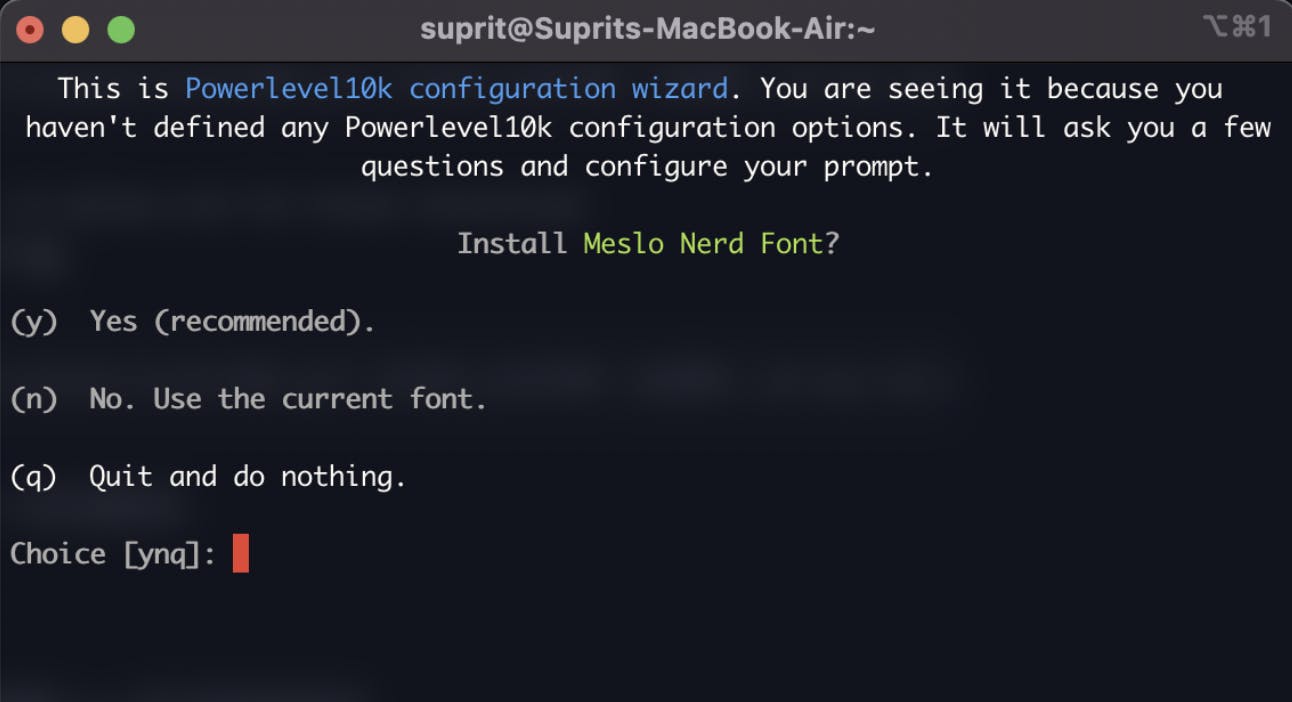
If you're on iTerm2, you should get this option to automatically install the Meslo Nerd Font, which a font with ligature support that works great with powerline10k. If you do not have any similar font in mind, you might want to go ahead with letting it install and use the Neslo Nerd Font
Here on, simply follow the steps in the configuration wizard, which are mostly about how you want the prompt to look. This is how my config ended up looking:

If you want, you can add margins to iTerm2 as well, so there's a margin of sorts between the terminal window and the actual shell. You can do this by going to Appearance -> Panes -> Side Margins in the iTerm2 preferences
Starship
Starship is a more minimal alternative prompt compared to powerlevel10k, but offering very similar functionality at the same time. Its quite snappy, being written in Rust. To get the starship shell prompt, run on your terminal:
brew install starship
After this, you need to add this line to the end of your ~/.zshrc:
eval "$(starship init zsh)"
Reload the terminal session or source zshrc and you should be seeing the starship prompt on your terminal
This is how the starship looks like!